High level stitching API (Stitcher class)
Goal
In this tutorial you will learn how to:
- use the high-level stitching API for stitching provided by
- learn how to use preconfigured Stitcher configurations to stitch images using different camera models.
Code
This tutorial code’s is shown lines below. You can also download it from here.
/*M///////////////////////////////////////////////////////////////////////////////////////
//
//  IMPORTANT: READ BEFORE DOWNLOADING, COPYING, INSTALLING OR USING.
//
//  By downloading, copying, installing or using the software you agree to this license.
//  If you do not agree to this license, do not download, install,
//  copy or use the software.
//
//
//                          License Agreement
//                For Open Source Computer Vision Library
//
// Copyright (C) 2000-2008, Intel Corporation, all rights reserved.
// Copyright (C) 2009, Willow Garage Inc., all rights reserved.
// Third party copyrights are property of their respective owners.
//
// Redistribution and use in source and binary forms, with or without modification,
// are permitted provided that the following conditions are met:
//
//   * Redistribution's of source code must retain the above copyright notice,
//     this list of conditions and the following disclaimer.
//
//   * Redistribution's in binary form must reproduce the above copyright notice,
//     this list of conditions and the following disclaimer in the documentation
//     and/or other materials provided with the distribution.
//
//   * The name of the copyright holders may not be used to endorse or promote products
//     derived from this software without specific prior written permission.
//
// This software is provided by the copyright holders and contributors "as is" and
// any express or implied warranties, including, but not limited to, the implied
// warranties of merchantability and fitness for a particular purpose are disclaimed.
// In no event shall the Intel Corporation or contributors be liable for any direct,
// indirect, incidental, special, exemplary, or consequential damages
// (including, but not limited to, procurement of substitute goods or services;
// loss of use, data, or profits; or business interruption) however caused
// and on any theory of liability, whether in contract, strict liability,
// or tort (including negligence or otherwise) arising in any way out of
// the use of this software, even if advised of the possibility of such damage.
//
//M*/

#include <iostream>
#include <fstream>
#include "opencv2/imgcodecs.hpp"
#include "opencv2/highgui.hpp"
#include "opencv2/stitching.hpp"

using namespace std;
using namespace cv;

bool try_use_gpu = false;
Stitcher::Mode mode = Stitcher::PANORAMA;
vector<Mat> imgs;
string result_name = "result.jpg";

void printUsage();
int parseCmdArgs(int argc, char** argv);

int main(int argc, char* argv[])
{
    int retval = parseCmdArgs(argc, argv);
    if (retval) return -1;

    Mat pano;
    Ptr<Stitcher> stitcher = Stitcher::create(mode, try_use_gpu);
    Stitcher::Status status = stitcher->stitch(imgs, pano);

    if (status != Stitcher::OK)
    {
        cout << "Can't stitch images, error code = " << int(status) << endl;
        return -1;
    }

    imwrite(result_name, pano);
    return 0;
}


void printUsage()
{
    cout <<
        "Images stitcher.\n\n"
        "stitching img1 img2 [...imgN]\n\n"
        "Flags:\n"
        "  --try_use_gpu (yes|no)\n"
        "      Try to use GPU. The default value is 'no'. All default values\n"
        "      are for CPU mode.\n"
        "  --mode (panorama|scans)\n"
        "      Determines configuration of stitcher. The default is 'panorama',\n"
        "      mode suitable for creating photo panoramas. Option 'scans' is suitable\n"
        "      for stitching materials under affine transformation, such as scans.\n"
        "  --output <result_img>\n"
        "      The default is 'result.jpg'.\n";
}


int parseCmdArgs(int argc, char** argv)
{
    if (argc == 1)
    {
        printUsage();
        return -1;
    }
    for (int i = 1; i < argc; ++i)
    {
        if (string(argv[i]) == "--help" || string(argv[i]) == "/?")
        {
            printUsage();
            return -1;
        }
        else if (string(argv[i]) == "--try_use_gpu")
        {
            if (string(argv[i + 1]) == "no")
                try_use_gpu = false;
            else if (string(argv[i + 1]) == "yes")
                try_use_gpu = true;
            else
            {
                cout << "Bad --try_use_gpu flag value\n";
                return -1;
            }
            i++;
        }
        else if (string(argv[i]) == "--output")
        {
            result_name = argv[i + 1];
            i++;
        }
        else if (string(argv[i]) == "--mode")
        {
            if (string(argv[i + 1]) == "panorama")
                mode = Stitcher::PANORAMA;
            else if (string(argv[i + 1]) == "scans")
                mode = Stitcher::SCANS;
            else
            {
                cout << "Bad --mode flag value\n";
                return -1;
            }
            i++;
        }
        else
        {
            Mat img = imread(argv[i]);
            if (img.empty())
            {
                cout << "Can't read image '" << argv[i] << "'\n";
                return -1;
            }
            imgs.push_back(img);
        }
    }
    return 0;
}
Explanation
The most important code part is:
Mat pano;
Ptr<Stitcher> stitcher = Stitcher::create(mode, try_use_gpu);
Stitcher::Status status = stitcher->stitch(imgs, pano);

if (status != Stitcher::OK)
{
    cout << "Can't stitch images, error code = " << int(status) << endl;
    return -1;
}
A new instance of stitcher is created and the cv::Stitcher::stitch will do all the hard work.
cv::Stitcher::create can create stitcher in one of the predefined configurations (argument mode). See cv::Stitcher::Mode for details. These configurations will setup multiple stitcher properties to operate in one of predefined scenarios. After you create stitcher in one of predefined configurations you can adjust stitching by setting any of the stitcher properties.
If you have cuda device cv::Stitcher can be configured to offload certain operations to GPU. If you prefer this configuration set try_use_gpu to true. OpenCL acceleration will be used transparently based on global OpenCV settings regardless of this flag.
Stitching might fail for several reasons, you should always check if everything went good and resulting pano is stored in pano. See cv::Stitcher::Status documentation for possible error codes.
Camera models
There are currently 2 camera models implemented in stitching pipeline.
- Homography model expecting perspective transformations between images implemented in cv::detail::BestOf2NearestMatcher cv::detail::HomographyBasedEstimator cv::detail::BundleAdjusterReproj cv::detail::BundleAdjusterRay
- Affine model expecting affine transformation with 6 DOF or 4 DOF implemented in cv::detail::AffineBestOf2NearestMatcher cv::detail::AffineBasedEstimator cv::detail::BundleAdjusterAffine cv::detail::BundleAdjusterAffinePartial cv::AffineWarper
Homography model is useful for creating photo panoramas captured by camera, while affine-based model can be used to stitch scans and object captured by specialized devices.
Certain detailed settings of cv::Stitcher might not make sense. Especially you should not mix classes implementing affine model and classes implementing Homography model, as they work with different transformations.
Try it out
If you enabled building samples you can found binary under build/bin/cpp-example-stitching. This example is a console application, run it without arguments to see help. opencv_extra provides some sample data for testing all available configurations.
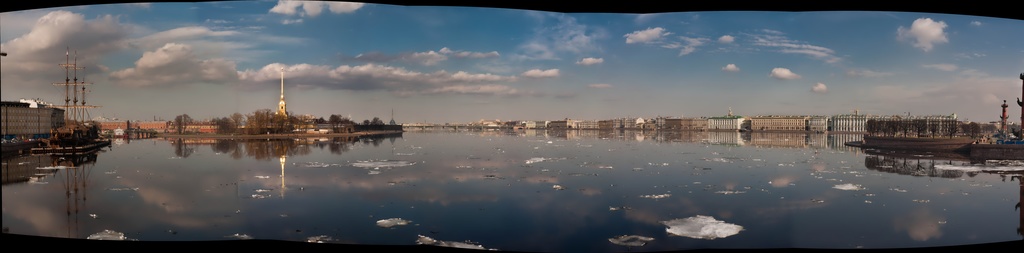
to try panorama mode run:
./cpp-example-stitching --mode panorama <path to opencv_extra>/testdata/stitching/boat*
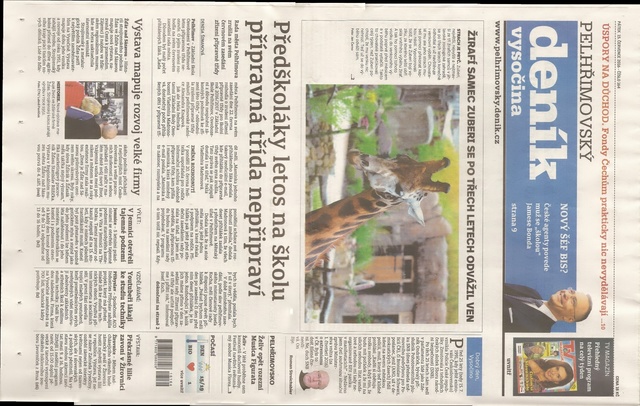
to try scans mode run (dataset from home-grade scanner):
./cpp-example-stitching --mode scans <path to opencv_extra>/testdata/stitching/newspaper*
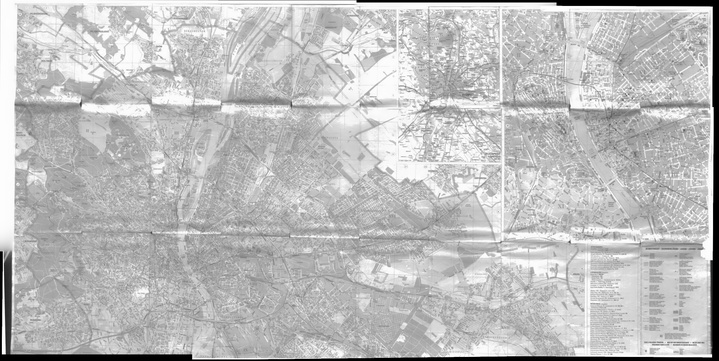
or (dataset from professional book scanner):
./cpp-example-stitching --mode scans <path to opencv_extra>/testdata/stitching/budapest*
Examples above expects POSIX platform, on windows you have to provide all files names explicitly (e.g. boat1.jpg boat2.jpg…) as windows command line does not support * expansion.
See also
If you want to study internals of the stitching pipeline or you want to experiment with detailed configuration see stitching_detailed.cpp in opencv/samples/cpp folder.